Using Registax
for
White Light videos
Registax is a powerfull tools that modern tecnology brought to the Amateur Astronomers...
In this article we are going to present you how we use it in our observing sessions step by step.
Hope you will find them interesting and they can help you in your observing.
In this article we are going to present you how we use it in our observing sessions step by step.
Hope you will find them interesting and they can help you in your observing.

In the left image you can see the solar granulation near the center of the solar disk. For this image (and all the images in this article) we used a Hershel Wedge on a 6 inch F/8 refractor and a DMK31AU03AS monochrome camera with a 2.5x TV Powermate and a 540nm filter with 10nm Bandwith. For all the images we used the Registax 5.1.
REGISTAX
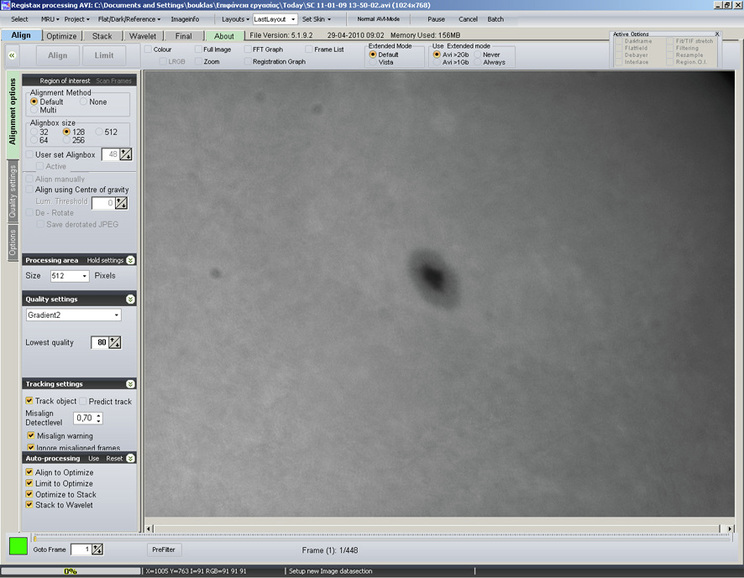
First thing we need to do is to load the video to the Registax Software
Step 01:
After loading the video to Registax, we need to choose the best possible framme to use as "Reference" for the "Alighn" procedure. In order to do that we need to search our video framme by framme.
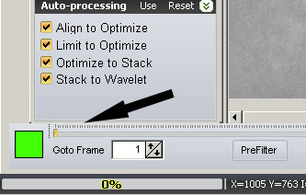
We can do that by clicking with the mouse the yellow cursor and moving it to the right.
We can do that by clicking with the mouse the yellow cursor and moving it to the right.
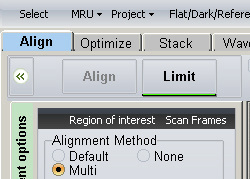
Step 02:
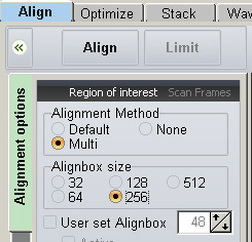
The next step is to choose the "Alighnment Method", this is going to determine much of the final result. In our observing sessions we use the "Multi" alighnment method ... This gives us the oportunity to use more than one alighnment points.
After that we need to choose how big will be the "Alighnbox" size. In our sessions we use the 256 alighn box.
After that we need to choose how big will be the "Alighnbox" size. In our sessions we use the 256 alighn box.
Step 03:
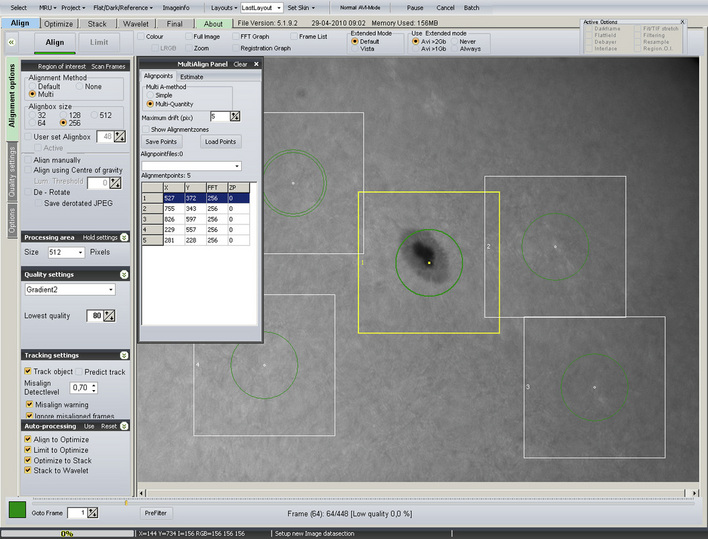
Next step is to determine the alighnment points that the Registax will use as reference points to initialize the "Align presidure". With the help of our mouse, we click on some of the most obvious features of the framme we choosed befour. After choosing all our alighn points we hit the "Align" button which is located to the top left of our software screen.
Step 04:

After the end of Align, we see that the software has choosen 108 frammes out of 448 frammes of the original video. Next to that we can see that the software has choosen all the frammes that were better than 80% much with the first one that we used as a refference framme.
Then we see that the "Align" button is deactivated and the "Limit" button is now underlined. For going to the next step we need to hit the "Limit" button.
Step 05:

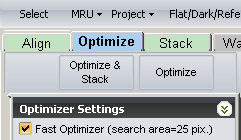
After hitting the "Limit" button, the software transfer us automaticaly to the next pannel of "Optimaziation".
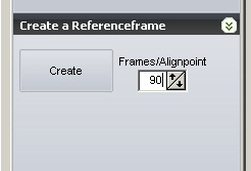
Then the next step is to create a more sharp framme than the first one in order to re-align the previus selected frammes so to produce the final image. To do that we click the "Create" button on the lower left of the software screen.

After hiting the "Create" button we see that the programm starts automaticaly the procedure of creating a reference framme.
Step 06:
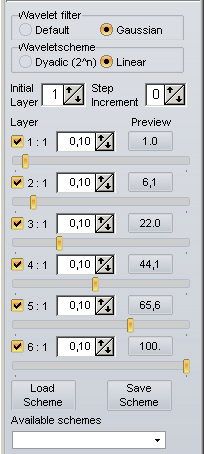
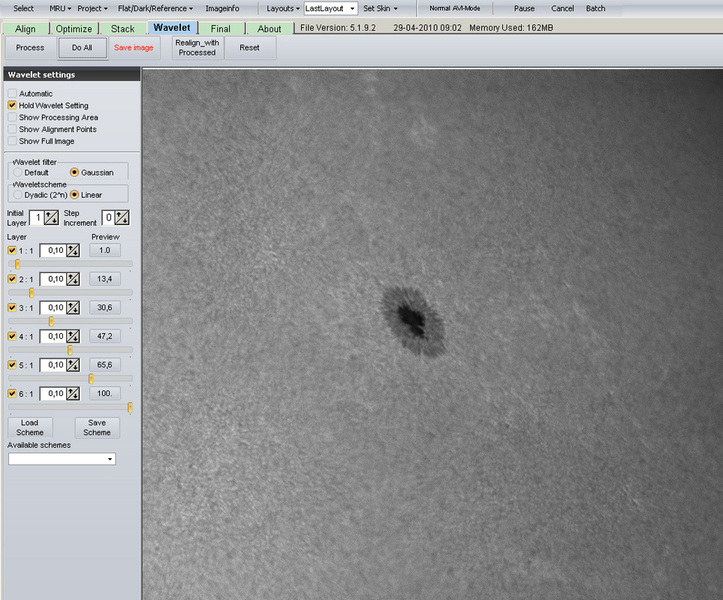
When the software finishes, it gets us directly to the "Wavelet" pannel. Here we are going to sharpen the image a bit in order to visualize as much possible detailes as possible so to realign the selected frammes so to produce the final image.
In order to sharpen the image created as Reference we use the "Wavelet Filter" control pannel.
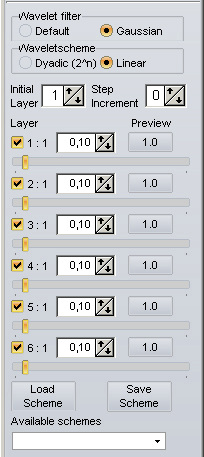
Theese are the settings that we use (with minor differences depending on the seeing conditions). You can play with the cursors and choose the best possible settings for you.
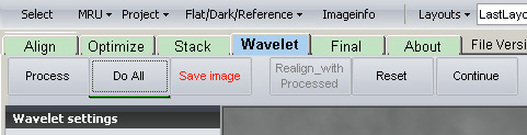
Step 07:

The next step is to presh the "Do ALL" button in order to aply the sharpening to all the image. Then we presh the "Continue" Button in order to go back to the optimization panel to create our final image.
To produce the final image we hit the "Optimize & Stack" button on the upper left of the software screen. Then the software automaticaly starts to work and finaly it gets us back to the "Wavelet" panel.
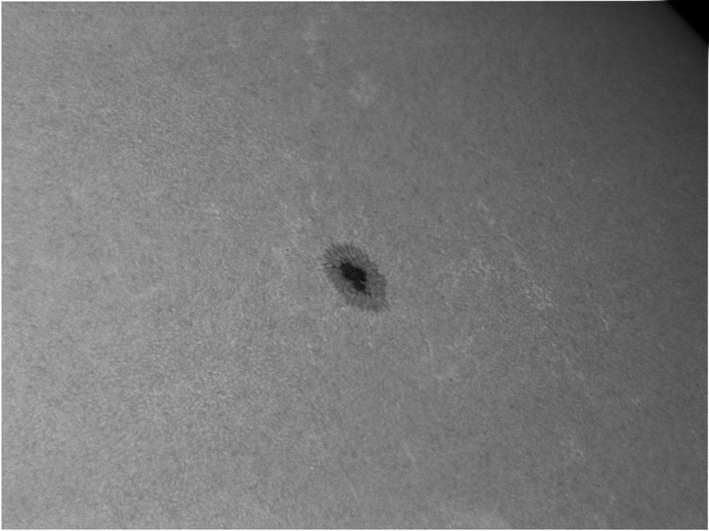
FINAL IMAGE
When the programm finishes the precidure it will get us to the Wavelet panel ...
The final image is ready to be saved ...
The final image is ready to be saved ...
For getting the "Registax" software or other freeware software.
Go HERE
Go HERE
